
Google Ads Campaigns are what make your Google PPC marketing tick. They are the starting point for your PPC marketing and it’s vital that you understand what they are, and how to create one. Below, I look at how to set up a Google Ads campaign including a step-by-step guide, and relevant important info.

What is a Google Ads Campaign and Why Should You Care?
In order to create ads on the Google Ads PPC platform you have to start by creating campaigns. Below I explain what a campaign is, and why it’s important.
Understanding the structure of Google Ads
Within Google Ads you have campaigns, ad groups, keywords, and ads.
- Google Ads Campaign: One campaign can contain multiple ad groups.
- Google Ad Groups: Contain keywords, ad copy, and landing pages.
So, an Ad Group is effectively one ad complete with its keywords and ad copy (i.e. text and images). Ad Groups are contained within Ad Campaigns, and an Ad Campaign can have multiple Ad Groups. I get that this might be a little confusing, and if you want any extra advice or explanation, you can get in touch with us to arrange a strategy session for your PPC marketing.
Why Google Ads Campaigns are important
Google Ads Campaigns are vital for structuring your PPC content. You can target audiences easier, utilise specific keyword groups easier, and do things like target specific products. For example, you might be a car garage have one Google Ads campaign dedicated to M.O.Ts, one dedicated to services, and another dedicated to repairs.
Instead of lobbing all your ads together in one huge campaign, you can organise them logically and get better customer ad personalisation and targeting as a result.
How To Set Up A Google Ads Campaign – 10 Step Process
Once you’ve created a handful of Google Ads campaigns you’ll be a pro in no time, but it can be a daunting process to start with. To help, I’ve using my experience to create a simple 10-step process on how to set up a Google Ads campaign:
1. Create an account with Google Ads
Hopefully you’ve done this already, but if not, it all starts with your Google Ads account. Open the Google Ads website and click the “start now” button. You then simply have to follow the step-by-step guide for creating your account and Google even takes you through the steps to create your first campaign.
You’ll have to enter payment details here, and there is the option to work with an expert – don’t bother doing that, once you get started everything will fall into place.
2. Choose your campaign objective

Instead of starting from the walkthrough, let’s take it from the beginning as if you were creating a new campaign from your dashboard. Once you are logged into your Google Ads dashboard you should see a side menu – click the Campaigns button.
This shows your current campaigns and it should show “No data” because you haven’t done anything yet. Click the blue plus icon below where it says, “No data”, then click the “New Campaign” option. This should open a new screen that asks you to pick your campaign objective and you can choose from the following:
- Sales: Get more sales for your business.
- Leads: Generate new business leads.
- Website traffic: Increase website views.
- App promotion: Get more people to install and engage with your app.
- Awareness and consideration: Increase your brand awareness to a wider audience.
- Local shop visits and promotions: Drive people to your physical retail venue.
Please note that these different objectives will impact how your campaigns function and what you can do with them so it’s important to think carefully about what you want to achieve.
3. Choose your campaign type
With an objective selected, you should see a list of campaign types below which you have to choose from. Currently, Google has six campaign types:
- Search: Text ads that appear on Google SERPs (Search Engine Results Pages).
- Performance Max: Ads that can be displayed across all Google channels.
- Display: Image ads that appear on websites.
- Shopping: Product listing ads ideal for ecommerce and retail.
- Video: Video ads displayed on YouTube and other websites.
- Demand Gen: Special type of video ad for YouTube, Discover, and Gmail.
As with the Google Ads campaign objectives, selecting the campaign type is also especially important as this directly impacts the type of ad content you need to generate. The most common ad type is the Search ad and this is where many people start, but Google also recommends the Performance Max ad type due to its versatility.
4. Varied inputs based on campaign type selected
Once you’ve selected your campaign type, what you do next will vary:
- Search: Select the ways you want people to interact with your business (website, phone, shop visit).
- Performance Max: Enter the final landing page where you want people to visit.
- Display: Enter the website address you want people to visit from your ad.
- Shopping: Setup a merchant center account/add relevant products you want people to see.
- Demand Gen: Turn on enhanced conversions for purchases or subscriptions.
Whatever you need to do next, you’ll also need to enter a campaign name. I recommend making the campaign name something specific and relevant to what you are advertising.
5. Check the search volume
One crucial step in setting up a successful Google Ads campaign is conducting thorough keyword research. By analysing the search volume for relevant keywords, you can determine the potential Return on Investment (ROI) for your campaign. This process is essential to ensure that your ads reach the right audience effectively.
To begin your keyword research, consider utilising tools such as the Google Keyword Planner and external platforms like Ahrefs. These tools provide valuable insights into the search volume for specific keywords, helping you make informed decisions about your campaign strategy.
We have prepared a detailed guide to walk you through the process of checking search volume and optimising your Google Ads campaign. Visit our website to access the guide and learn how to leverage keyword research for maximum impact: Google Ads Keyword Planner Guide.
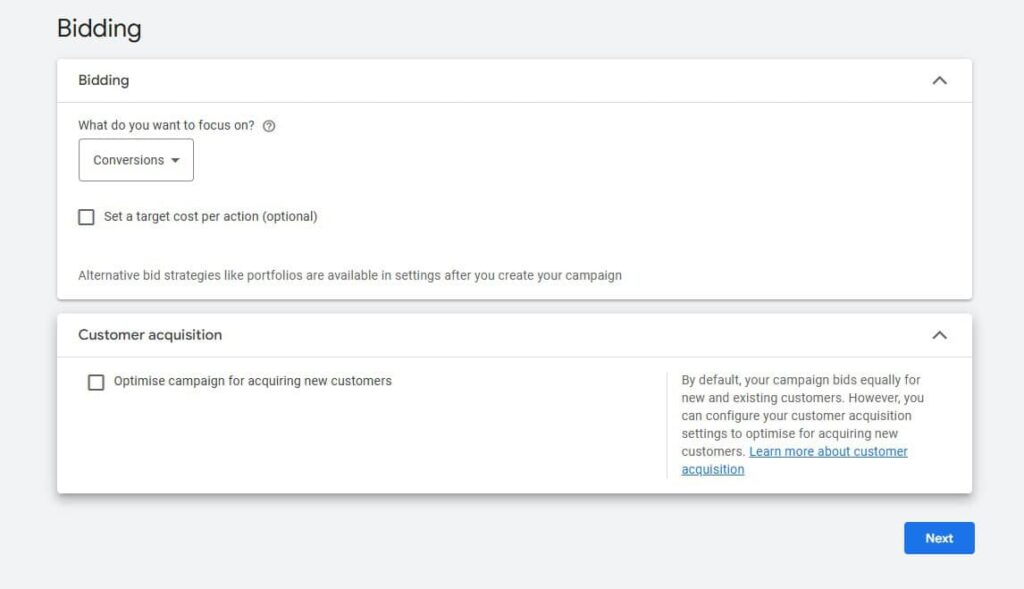
6. Set generic bidding info
The bidding page will then open and you can choose what you want your bidding to focus on:
- Conversions.
- Conversion value.
- Clicks.
- Impression share.
You can also enter a target CPA (Cost Per Action) if you have formulated an ideal figure from your marketing research, but this is optional. Please note that this is just the barebones bidding info and you can get more in depth with this once the campaign is created.
7. Input your campaign settings
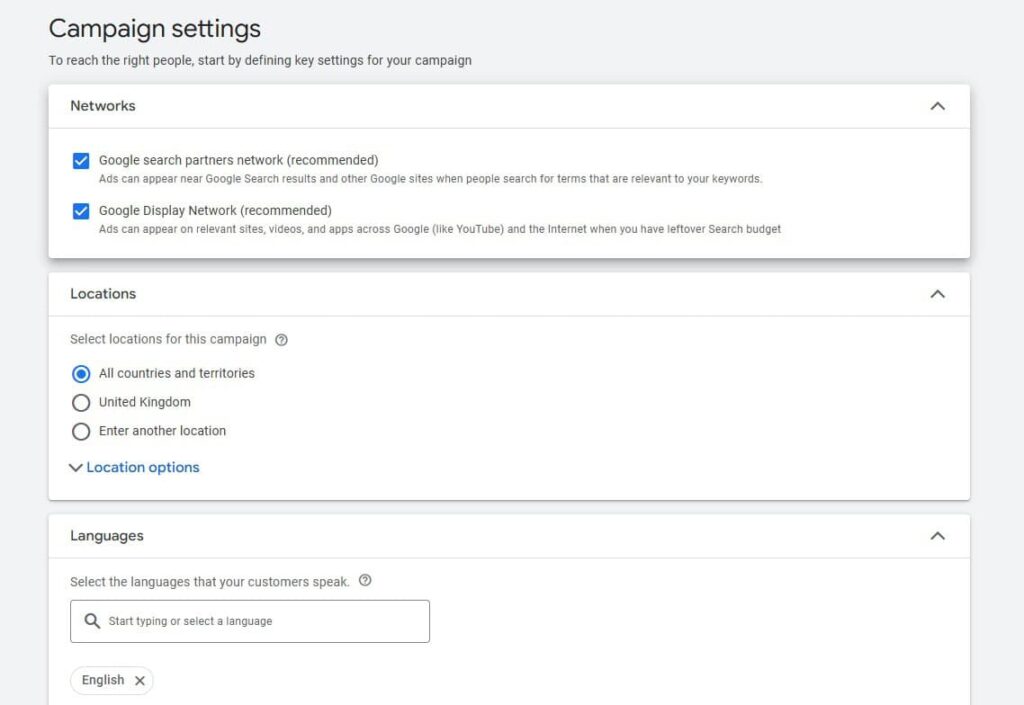
Now you get to enter some generic campaign settings which will vary depending on the ad type you selected. For example, with search ads, you can change the following settings:
- Networks: Choose which Google networks your ads can display on.
- Locations: Enter a specific geographic location such as the UK or leave it global.
- Languages: Specify if you want your ads in multiple languages.
- Audience segments: Choose specific audience segments you want your ads targeted to.
- Board match keywords: I recommend leaving this on as it will help with keyword matching for your ads.
Most of these are self-explanatory. There is also a “More settings” option that can be useful to set the start and end date of your campaign, and URL options.
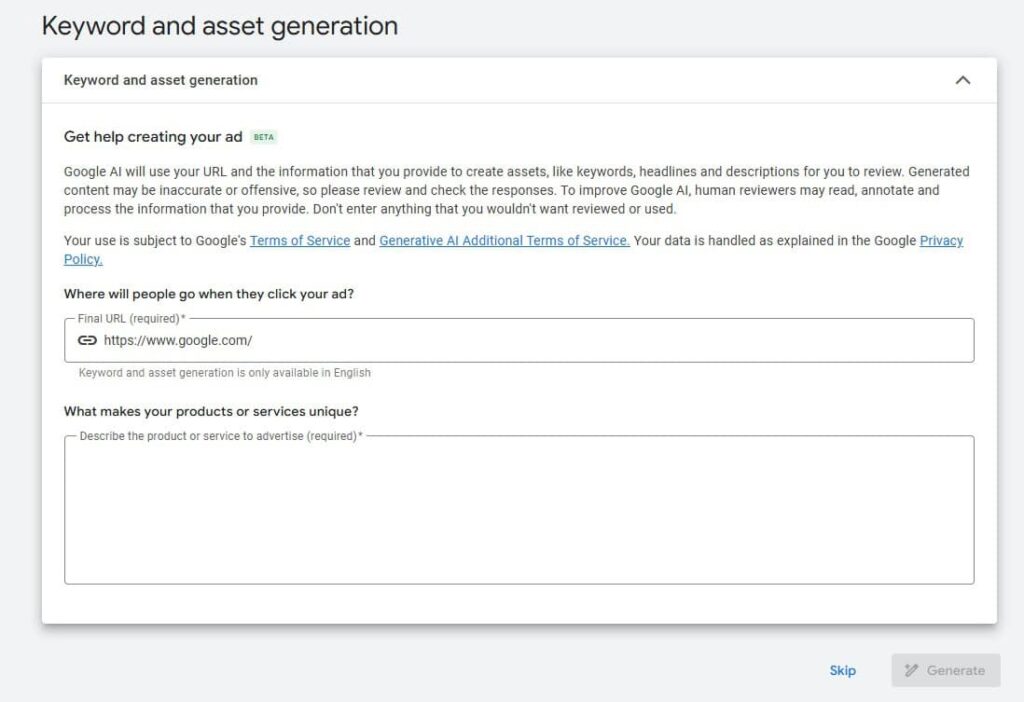
8. Use the keyword and asset generation tool
The next step is optional, but it can be incredibly useful for generating ideas and content for your Google Ads campaigns. Essentially, you enter your website URL where you want to direct users, plus write a description of your company/product.
Google AI will then go away and generate a range of assets including keywords, headlines, and ad copy that you can review and use. You don’t have to use any of the generated assets, but I find that it can be helpful for idea generation.
9. Set your keyword lists and ad copy
Now you can get keyword suggestions be entering your final URL and add your keyword lists in the top section of your initial ad group. Remember that a campaign can have multiple ad groups so be sure to name each group appropriately.
Once you’ve completed that section, click the minimise arrow on the right-hand side of the keywords box. This will minimise it and you can then see the ads box. This is where you create the actual ad copy including headlines, descriptions, site links, and other assets.

10. Set your budget and review
The last step is to set your Google Ads campaign budget. Google Ads will provide several suggest budgets and show the following estimated figures:
- Average daily budget.
- Weekly conversions.
- Cost per conversion.
- Weekly cost.
These are only estimates based on the keywords you selected and the daily budget. Alternatively, you can also set a custom budget. To start, I recommend sticking with the suggested budget provided it is inline with your marketing budget allocation.
With your budget selected, you can review your choices from the previous sections and finalise your campaign draft. At any stage during the process, you can also click the relevant section from the side bar to go back to a previous stage if you want to make any changes.
You’ve now made your first Google Ads PPC campaign and depending on the start date you selected; it should go live and you can start monitoring the progress.
Get Your PPC Started and Create Your First Google Ads Campaign
I hope you’ve found this guide on how to set up a Google Ads campaign useful. This process can seem overwhelming, but the step-by-step process Google Ads offers is incredibly beginner-friendly, and you’ll find a heap of tooltips and suggestions too. If you want help creating your first Ad campaign or guidance with your PPC marketing before having a go yourself, you can contact us and we will use our years of experience to help.


